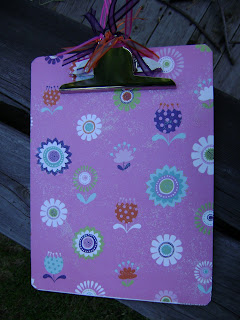
My daughter and I had a nice girly day. We did lots of hanging out but towards the end of the day she said she wanted to make a gift for her teacher. At first she wanted me to knit her a bunny... I talked her out of that. Then she thought we could decorate a clipboard for her since she uses them all the time. GREAT IDEA!
Before we went to get the supplies I found these awesome/easy instructions
I will say my almost 6 year old daughter has great taste and a good eye for awesome prints! She found this blue sparkly paper she wanted to use and we just went from there.
Here are the supplies
We cut out the paper by tracing the clipboard on the wrong side and then cutting it out. I let my daughter put on the mod podge on herself. We then placed the paper on one side. We found that the paper didn't want to stick at first so we used some heavy items to help smooth the paper and help hold it down.
After the paper was glued to each side we added ribbons to the clip. Our clip board could actually come apart and that was nice at first, until I had to screw it back together... But I eventually did!
We added stickers to the back spelling out Ms. Moore's name. We also put another finishing coat of mod podge on top of the paper and stickers to seal everything in.
It turned out pretty cute and we are both very proud!


It looks awesome! I love the paper! Great job ladies! :)
ReplyDeleteSuch a cute idea! I'll have to remember this for when my little ones are in school.
ReplyDeleteTurned out so cute!
ReplyDeletewow, too cute!
ReplyDelete